Strategy and Overview (Essential Reading)
Design and Farm Overview
Yellow mealworms are very susceptible to Heat and temperatures over 28 degrees and their productivity drops of dramatically. This is one of the main reasons some people have difficulty breeding mealworms consistently. For warmer climates (warm temperate, sub tropical, tropical) consider using the Tropical Giant Mealworms. For mere Details
What Mealworm Method do I Choose– There are two methods to choose from based on the size of your farm:
-
-
- Screen Method (Hobbyist and Small Scale)
- Filtering Method (Medium and Large Scale)
-
How Many Mealworms Can I Produce
Small scale will vary greatly but around 200-600g if climate is sufficient. In Climatically controlled commercial set ups, you can get up to 1.5kg or greater per 60 by 40cm tray.
For more details visit Chapter 2.0.
Breeding Yellow Mealworms
Biology (yellow mealworms)
Lifecycle: The lifecycle of the mealworm comprises of the following 4 distinct stages. It takes approximately 10-12 weeks (3-4 months) for a mealworm to go from egg to adult size (at 25-28 degrees). The beetle stage will go for another 8-12 weeks (2-3 months). At cooler temperatures the duration can increase significantly .
The life cycle of the Darkling beetle takes approximately 3-6 months to complete depending on conditions . Below are the life cycle time frames:
- Eggs – Once the beetle emerges from the pupa (cocoon) it takes approximately 2 weeks for them to mate and lay their first eggs.
- Larvae (mealworms) – Approximately 1-4 weeks after the eggs were laid, baby mealworms appear in the substrate.
- Pupae – It can take anywhere from 7-10 weeks for the mealworms to develop to the pupae stage.
- Beetle – It takes around 1-3 weeks for the pupa to develop to the beetle stage. Beetles live for around 2-4 months.
- Diet: Omnivorous, eating plant and animal products. In captivity they eat wheat and oat substrates.
- Natural Habitat: Found in organic and decomposing materials.
- Human Uses: Used for feeding animals in wildlife rescue, zoos and for stock (chickens, fish)
- Distribution: Originally from Mediterranean, but now found in many parts of the world.
For more details visit Chapter 3.0
Managing Pupae
Managing pupae is important as they are susceptible to death and you need high pupae number to get high productivity. Unfortunately they are one of the most difficult life stage to manage. Pupae need to be separated from the mealworms so they don’t get eaten. There are two methods to separate pupa from the mealworms:
Pupae Platform Method– Pupae are placed in the same tray as beetles, but on elevated platforms so they don’t get eaten.
Pupae Substrate Method– Pupae are placed in a dedicated pupa tray with substrate. When the beetles emerge they climb on egg cartons and are removed regularly.
For more details visit Chapter 4.0
Managing Beetles
The successful recruitment of beetles is critical to productive breeding. Beetles of the yellow mealworm die at high temperatures (higher than 28 degrees).
Beetle Densities– High densities of beetles provides high density of eggs and mealworms. We provide recommended densities for productive breeding.
Beetle Demographics– Beetles produce the most eggs in the first 4-5 weeks. By maintaining a young demographics of your beetles you will maintain high production.
For more details visit Chapter 5.0
Screen Method (Hobbyist)
Used for Small Scale or Hobbyist mealworm production. A basic unit comprises of 5 trays.
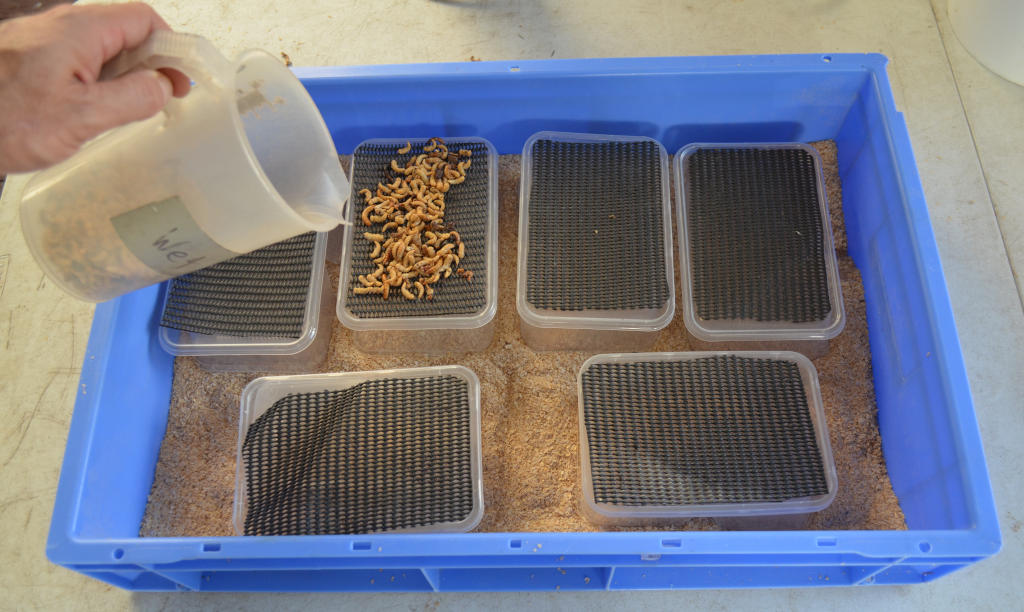
Tray 1 (Screen Tray)– A tray with a screen on the bottom. This tray houses all the breeding stages which includes beetles, pupae and eggs. Beetles lay eggs in substrate which hatch and move downwards through the screen on the bottom into Tray 2 below. Pupa are protected from being eaten by the beetles by placing them onto Pupae Platforms.
Tray 2- Houses the baby worms which grow out in their tray.
Tray 3 (weeks 1-4)- Houses the medium worms which grow out in their tray.
Tray 4 (Weeks-5-8)- Houses the medium worms which grow out in their tray.
Tray 5 (Weeks-9-12)- Houses the large worms which grow out in their tray.
Once the worms reach maturity they are harvested and the pupa that develop (leave 10-15% for breeding stock) are placed on the pupae trays in Tray 1.
For more details visit Chapter 6.0
Filtering Method (Medium or Large Scale)
The filtering method separates eggs/substrate from the beetles by filtering. More productive than Screen method, however requires more maintenance and better suited for commercial production. As all the substrate/eggs are removed it greatly reduces egg predation by beetles. This however adds extra maintenance and is typically used in medium/large scale production.
Each week the eggs and substrate is removed from the beetle tray and placed into a new tray for the current week (This Weeks Beetle Tray). Every week all the beetles that are generated are placed into a separate container so that over time the 10 beetle trays are arranged from youngest (week 1) to oldest (week 10).
Each of the Beetle trays will generate eggs. If there are high number of beetles then each beetle tray can generate one Grow out tray (10 new grow out trays per week). If low beetle numbers are present then 2 beetle trays will generate enough eggs for one grow out container (5 new grow out trays per week).
For full details visit chapter 7.0 or method summary page
Breeding Giant Mealworms
Coming soon!
Husbandry Requirements
Housing
Trays or Draws
Mealworms can be housed in either dedicated trays or plastic draws.
When using Plastic draws, you must drill sufficient holes in them for ventilation. Lack of ventilation will result in mold and pests such as mites.
Shelving for Trays
Shelving for trays is usually made from wood or metal structures. Wood shelving is cheap and easy for DIY, however it does degrade and warp over time.
Metal shelving is strong, durable and can be purchased in various sizes. It does require some retrofitting.
For more details visit Chapter 11.0.
Food and Water
Dry Food
Dry food or substrate is not just the housing for the worms it is also the food. One of the more common and cheaper options is wheat or oak bran. Other fragments which can be used are flour or wheat pollard and mill run. Chick starter crumble is added for adding nutritional diversity.
Substrate should always be stored in sealable containers to prevent mold and pests.
Wet Foods
Good Foods
Vegetables such as carrot, sweat potatoes, potatoes, broccoli and cauliflower (including stems and leaves), beans and other green vegetables are eaten.
Bad Foods:
Some items which should not be given to mealworms are: avocado, citrus, meats very wet and soggy fruits (watermellon, stone fruit, tomatoes).
Feeding Frequency
Regular feeding and removing old dead foods (vegetable scraps) is preferable, however up to the individual. Most vegetables will get moldy after 2-3 days in warm weather. Not removing vegetable scraps on a regular basis exposes you to mold and pests such as moths and mites.
For more details visit Chapter 12.0.
Climate
Temperatures
Best temperatures for yellow mealworms is between 25-28 degrees. Many other species of insects (crickets, cockroaches, giant mealworms) prefer higher temperatures. Temperatures over 28 degrees will greatly increase the death of yellow mealworm pupa and beetles.
Giant mealworms are tropical and can handle temperatures up to 40 degrees with little problems.
Cooling
Cooling is more difficult than heating, and usually requires either increasing ventilation/circulation or air conditioning.
Ventilation and Circulation
Important for reducing mold and mites.
Humidity
Aim to maintain relative humidity between 50-60%. Values above this will increase mold and pests, and values less than this will cause dehydration to pupa and molting worms.
For more details visit Chapter 13.0.
Maintenance
Separating Worms, Substrate and Frass
Many household items such as sieves and plastic noodle strainers can be used to separate mealworm fragments, however one of the best options is using gold sieves that attach to 20L buckets. Other options include drilling holes into buckets, nursery trays and worm farms.
Dust can be greatly reduced by making a Dust Protector.
This section outlines how to make an efficient cleaning station and a good Disinfectant Spray recipe.
Schedule
This section outlines a general maintenance schedule for the Screen Method and Tray Method.
For more details visit Chapter 14.0.
Pests and Disease
The main pests/disease issues for mealworms include mold, mites, moths, spiders and ants.
Freezing and Storing substrates in sealed containers is one of the best ways to prevent mold, mites and moths. The other main factor to control mites and mold is avoiding high temperatures and humidity.
Spiders and ants can be controlled by the use of traps, poisons or vacuuming.
For more details visit Chapter 15.0.
Commercial
Coming soon!


